!!! Read carefully information below. Especially this part !!!
(Export is only export and cannot change yours products and categories.)
But wrong import setting can duplicate or overwrite some product and categories!!!
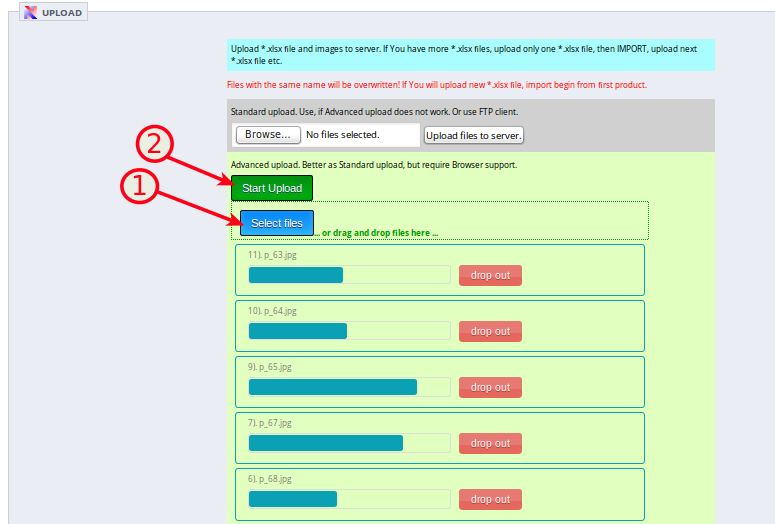
1/ Select files .xlsx (and .jpg, if images are not as link in .xlsx file)
2/ Upload. Be sure, that .xlsx file is not opened in MS Excel or in Calc. If is opened, is not readable for import module. Upload only one .xlsx file, if You have products in more files. Uploaded .xlsx is automatically renamed to expected name. (If You upload using FTP client, You need rename .xlsx file to right name.) Do not upload zipped archive. Unzip before upload. Remember that PrestaShop and server have max upload size limit, so each file should be under this limit.
If You upload next .xlsx file, import begin from first row from this file. So, You can upload all images all at once, but .xlsx step by step with import.
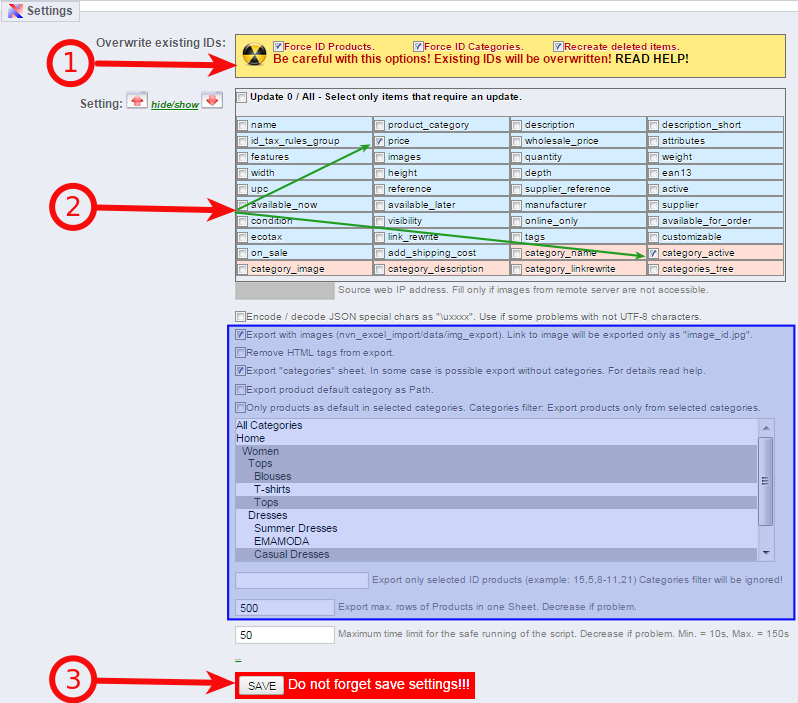
1/ Check “Force ID” setting. Important !!! read more below.
2/ Click “MANUAL IMPORT” ( optionaly with “Test one products”) or “AJAX IMPORT” button for automated import. Import from current .xlsx is finished, if “IMPORT IS FINISHED” is listed in report.
1/ Before new import You need upload new or edited (or same) .xlsx file or “RESET IMPORT FILES”
2/ Hidden option for map tables, will be clarified below.
Important – force ID option
Options in blue rectangle are export options and are ignored by import.
During import are created map tables with ID in .xlsx and ID assigned in e-shop. This map tables are used for next import and update.
If product / (category) ID is missing in map table, product / (category) is added / overwritten. For new product / (category) will be imported all fields from .xlsx and ID will be added to map table. For overwritten product / (category) will be overwritten selected fields and ID will be added to map table.
If product / (category) ID is present in map table, will be updated only selected fields.
In short:
For edit in current e-shop: export from e-shop then edit and import into same eshop, enable Force ID. Items with same ID will be overwritten, items with new IDs will be added. Missing IDs will be added into map tables.
Import into another not empty e-shop: create new sheet with new products or export file from any e-shop and disable Force ID. (viceversa You can overwrite some IDs). Imported items will be added with new ID assigned by PrestaShop. New IDs will be added into map tables.
Import into new empty eshop: create new sheet with new products or export file from any different e-shop. Force ID can be enabled or not, depend if You need specific ID. Enable Force ID if You need yours IDs. Disable Force ID – PrestaShop add own IDs. Before import into new empty eshop You can use “DELETE ALL” button. In this case values of ID Products, Categories, Attributes groups, Features, Manufacturers, Suppliers will be set to initial.
Next import of products presented in map table will update only fields selected for update.
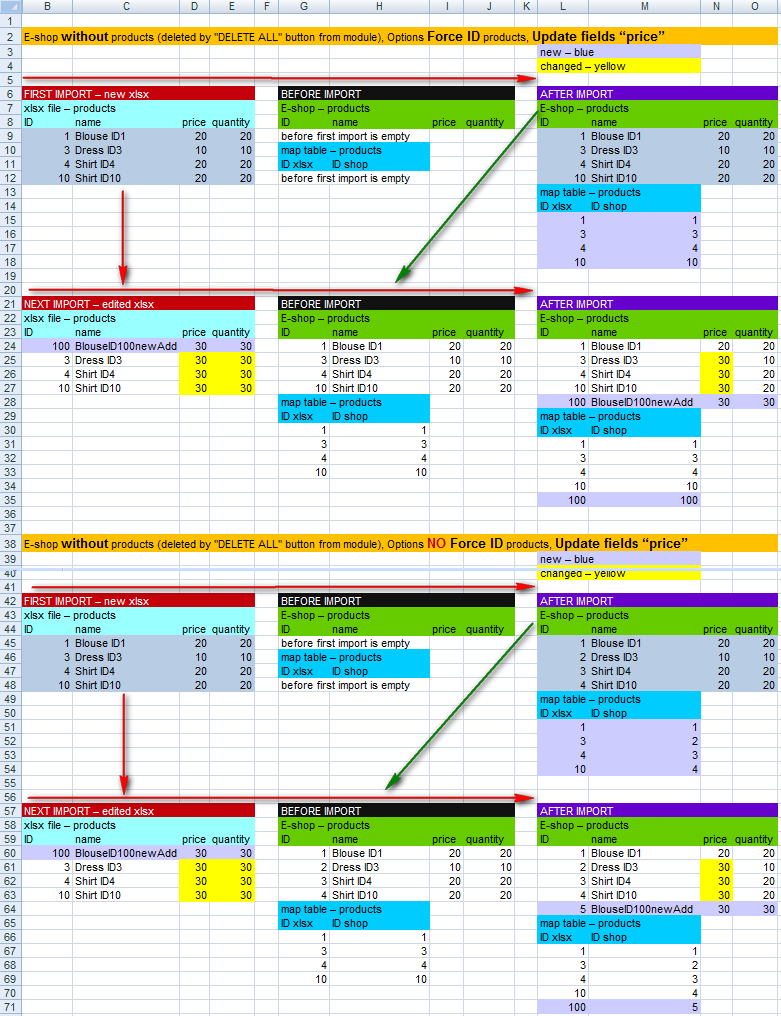
Examples below are for setting “Force ID Products” Yes / No. (For “Force ID Categories” are valid same rules.)
Example for import into empty e-shop with and without “Force ID”, with option “update price”
Example for import into e-shop with products and with “Force ID”, with option “update price”
Example for import into e-shop with products and without “Force ID”, with option “update price”
Read more:
Overview: http://www.praotec.com/prestashop-excel-import-export-quick-help/
Export setting: http://www.praotec.com/nvn-import-export-xlsx-ms-excel-file-export-setting/
Workbook editing: http://www.praotec.com/nvn-import-export-xlsx-ms-excel-file-workbook-editing/


